Showing posts with label Technique. Show all posts

Saturday, May 2, 2009

Tissue Paper Background Tutorial


We were talking about background textures on the Paper Whimsy forum and I thought it would be fun to do a basic tutorial on one of my favorites; tissue paper background! Easy peasy, anyone can do it and you probably have all the supplies on hand. Have fun!

I own all the text and images in this tutorial – feel free to use them for whatever you want. Commercial, not commercial, credit me or don’t credit me it’s all good with me. Hugs, Carol
Step ONE: Gather all your supplies. You will need:
  • Substrate - things like cardboard, heavy watercolor paper and cardstock work best for this technique.
  • Tissue Paper – any color, design or style. If you don’t like the color or design you can paint over it, right?
  • Adhesive – I use gel medium but you can use any wet adhesive like Elmer’s glue or ModPodge.
  • Paint Brush – any size or style but I would recommend 1”-3” in width depending on the size of the substrate. You want to be able to apply the adhesive quickly.
  • Assorted Inks - sprays, paint, alcohol inks, stamp pads to name a few.


Step TWO: Crumple the tissue paper. I usually crumple the tissue pretty tight (left of photo); then loosely open it as shown to the right of the photo. Of course it depends on the end result you want for your background. The more you open up the tissue, the less texture you will get.

Step THREE: Using the paint brush, apply the adhesive somewhat generously to the substrate. Use enough adhesive so that it remains wet until you can place the crumpled tissue on it. I don’t spend a lot of time thinking about the placement of the tissue. I just plop it on there and press it down using my hands.

If I want a more flat texture, I use a brayer or the adhesive jar/bottle to press it down a bit more.
Step FOUR: While the tissue is still wet, tear off the extra tissue around the edges. You can trim the edges with a scissor if you want but I like the randomness of the torn edges.

At this point, I usually put a light layer of the adhesive over the top and let it dry completely before proceeding to the next step.

Once the tissue is dry…create to your heart’s desire. Rub ink pads over the raised area to highlight them or use acrylic paints and dry-brush them on. Just go crazy and have fun!
*****************************************************************************
Here’s a piece I quickly did to show you a collage piece from start to finish. I started with some old tissue that came in a gift package, crumpled it up, unfolded it a bit, and glued it to the cardboard substrate. Notice that this tissue paper didn’t leave large wrinkles like the pink one did. It was a bit lighter weight and didn’t crumple as much. Interesting, huh? Who knew? LoL

Next I tore along the edges of the substrate to remove the extra tissue and applied a light coating of gel medium over the top. Notice that this time around, I applied the gel after tearing…see you can mix it up! I hate repetition and rarely do things exactly the same way twice.

After the tissue was dry, I took my “Old Paper” Distress Ink stamp pad and rubbed it over the raised areas. I was surprised how many highlights actually came out…it didn’t look like there were that many; did it?

After the ink was dry, I laid a stencil on it and sprayed over the top with “Orange Juice” Memories Mist. I LOVE orange!

After that was dry I took a favorite rubber stamp, inked it up with black ink from a stamp pad and made a row of paisley designs across a portion of the background.

After that was dry I used my favorite fluid chalk pads and rubbed around the edges in hot pink and orange, which you can see in the next photo. For me, this is what makes art interesting…lots of layers on the background…and this is before you even start putting your images and embellishments on.

Notice that I always let each layer dry before adding a different color element. Otherwise, things can get muddied up a bit and unless that is what you are going for, it will be disappointing to do all this work and have to gesso over it only to begin again. Wah! However, I always have my heat gun handy to help the drying process along; just don’t get it so close that the adhesive bubbles up or the tissue catches on fire! LoL
Reminder - when using a heat tool always keep your eyes on what you are doing. From beginning to end, this background only took about ten minutes.
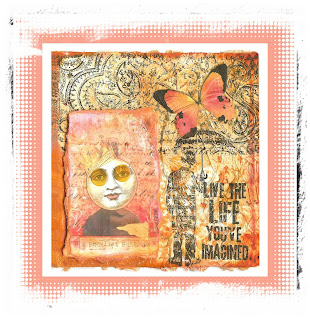
Now you are ready to add your collage bits! Can’t wait to see what you create next! Hugs, Carol

Sunday, November 2, 2008

Cheech & Chong for Peggy

Peggy's theme this month for our 8x8 tip-in swap is Famous Movie Couples. I originally was going to do Lucy & Desi but someone did that already sooooo.....I chose Cheech Marin & Tommy Chong! I just love these two guys and their movies and comedy crack me up. I did a little different background technique...tissue paper, soft-gloss gel medium, pearl-ex powders, stickles and rubber stamped images. Really soft hand and beautiful in person. Hope Peggy likes them!

Sunday, June 15, 2008

Brothers Grimm Swap

I am participating in Lenna Andrews Grimm Fairy Tale Collage Swap. If you are not familiar with the Grimm Fairy Tales, take a look at this Wikipedia entry.This swap is sponsored by Alpha Stamps and has required Alpha Stamp products. It is a 4:4 swap with one extra as a gift for the hostess. :)

I started out with 5"x5" collage board and adhered the castle transfers I made earlier in the week. Then I cut out the Cinderella images I wanted to use and other embellishments. For the golden edges, I melted clear UTEE and added some Antique Gold Pearl-X, then applied it using a floppy watercolor brush. I'm a bit disappointed with these...overall, they look fine but I spent weeks on these from start to finish and they don't look it. OH well, such is life! :))

Tuesday, June 10, 2008

September 8x10 collage for Paper Whimsy Calendar 2009

Hello friends...here is my September collage for the calendar project. I was kind of stressed about this piece because it is going to be printed in our PW Calendar for the year and I didn't want to disappoint anyone. I have been thinking about it and working on it for several weeks and am finally pleased with the results. Hope you like it too.

I knew from the start that I wanted to use a school theme for September. I know most kids now start back to school in August but in "my day" we always started after Labor Day weekend. Mom took us shopping for that new first-day-of-school outfit...got a new book bag and new shoes...just like this precious Whimsy in the photo.

The schoolhouse is a gel transfer created from a photo I took of the one-room schoolhouse in my home town. The schoolhouse has special meaning to me...several years ago my dad and some of his old school buddies got out the photos they had of their country school and had an architect draft blueprints to build an exact replica at the museum. To the best of their ability and memory, this is it and I love it! It's filled with old books from the 1930's along with school desks and original slate chalkboards and a school bell (found at another old school that was on someone's farm in Monroe County).

My great-grandfather helped build the first school in the 1930's and my dad helped build the replica in the 1990's. I am so proud of both of them and all they have done to promote education in my home town. Throughout the year, school kids from all around Iowa take a tour of the school, ring the bell and sit at the desks while the "teacher" (docent) tells them all about school back in the day. They bring their sack lunch and get to write on the chalkboard...it's definitely hands-on and they love it!

Here is my rendition of what the school would look like in the land of Whimsy... you can create your own story of what she will find inside. Will you enter? Thanks for allowing me to share the story...

Tuesday, June 3, 2008

Gel Medium Fabric Transfer...OH FLIP!

Picture this...I'm sitting here alone tonight with my Cinderella collage images in one hand and my castle images in the other...yes I'm participating in Lenna Andrews' Brothers Grim Collage Swap sponsored by the generous Leslie Elledge at Alpha Stamps.

Okay...so I'm sitting here with my castle images and some plain fabric thinking now how am I going to incorporate these two and before I knew it I slathered some gel medium on the printed image, slapped the piece of fabric on it and brayered it together. After about a minute, I pulled the paper off and there was this freakin' cool transfer. I shouted "Oh Flip!" and Ginger looked at me like "what now you dork?"

This transfer is so simple, I can't believe that I haven't done it before. Now I am so excited to work on the next phase tomorrow night which will include the Cinderella collage sheet images I chose from AlphaStamps and who knows what will ensue from there. Can you figure out which AS images are going with these backgrounds? If you haven't tried this technique before...get going sister! You won't regret it! Not to brag, but aren't they stunning? :)) Good ole' beginners luck...gotta love it! Hugs, Carol

Thursday, May 1, 2008

8x8 Tip-In Pages for Dorothy

For Darling Dorothy...theme vintage children, flowers, shabby chic. LOL - guess I don't do the shabby part very well but I tried. :)) New techniques to try...fiber stems, paper beads wrapped with thread and beads. clay 3-D embellishments.


Wednesday, March 12, 2008

Mermaid Paper Doll Shadow Box


PaperWhimsy had a sign-up for a Paper Doll Shadow Box Project and you know I had to sign up!! Love the paper dolls and we were given a "secret sister" to create for. I have fun all month teasing my "sister" so that she wouldn't think it was for her. I know she loves it and can't wait for her to receive it in the mail.

The doll has a PW face with french text body & arms. I hand-drew the "seaweed" around her face and added the crystal and flower embellishments. For her tail (which moves) I used distressed embossing powder.

For the background, I did some needle felting using a stencil and poked the olive & lime roving through the cut-outs to make the "seaweed" design. I added some navy and purple roving to create a bit of a swirld and after placing the doll on the background I added some sequins and beads. Do you like it? I am very pleased with her and excited to mail her to her new home. :-)

Tuesday, January 8, 2008

January, Day 7 - Back to the Basics

Patricia and I promised to start back on Bernie Berlin's workshop after the first of the year so yesterday we discussed the next technique "Stencils" and here are the results. I LOVE IT! Sorry, just had to shout that out cuz this was so much fun...definitely try it! I highly recommend this book, you can even click on the amazon link to the right of my blog and go purchase it there.

I used 140# watercolor paper as the base...nice and sturdy (also a favorite of mine). Using heavy acrylic paint, I painted the background a nice Tangerine Orange. Once that was dry, I used a square stencil and pounced in some semi-opaque Orange Juice acrylic paint. I let that dry completely and then added the Pure Pink acrylic stenciling using star-shaped punchinella.

I liked how that looked very much but have been itching to use some stencil paste I had so I added the final layer using the paste and various flower stencils! WOW! Once again, I'm sorry...I just had to shout. Love it, don't you?
I am going to cut these down to two 10.5" x 3.5" strips and send one of them to Patricia. That way we can use them for IttyBitty or ATC backgrounds. She is going to send me 1/2 of hers too. Isn't that fun? Can't wait to see what she creates.

Tuesday, October 2, 2007

Technique #5 Inky Layers

Oh my goodness! I love any technique that involves layers and this one is a real winner! This week Patricia & I are doing "Inky Layers" from Bernie Berlin's book "Artist Trading Card Workshop: Create, Collect, Swap" and I think the results were awesome! I used paper from a dictionary, sheet music, magazine (glossy), & scrapbook paper. I didn't have any translucent glittery ink or paint so I used a drop of silver alcohol ink and rubbed it around. I like the results! Here are a couple photos of the finished products!

Wednesday, September 19, 2007

Technique #4 "Leafing Pen Resist"

This week Patricia & I worked on "Leafing Pen Resits" which is Technique #4 from Bernie Berlin's book "Artist Trading Card Workshop: Create, Collect, Swap". Bernie states that this technique works best on watercolor paper so that is where I started. My pages turned out really cool so I decided to try the same technique but using alcohol inks on semi-gloss paper. Woah! Totally different look but equally exciting.

Here are the watercolor pages using just two monochromatic colors. Imagine what they would look like if I would have used 2-3 complimentary colors. She also recommends using a stamp design over the top of these which I haven't done yet. But I did stamp the alcohol ink sheets and used them for the legs on this little fairy doll! Pretty cool homemade design huh? I may never buy scrapbook paper again!!! :-)

Thursday, September 13, 2007

Techniques 2 & 3 Watercolor on Baby Wipes & Paper Towels

This week Patricia & I are working on Techniques 2 & 3 from Bernie Berlin's book "Artist Trading Card Workshop: Create, Collect, Swap". I'm excited to say that another artist, Cheri Phillips, is going to join us in this process. :-)

Patricia did hers first and made some amazing backgrounds on baby wipes using spray mists (which she's already used). I tried that and wasn't as pleased with my results...maybe I didn't wait long enough for the paint to dry but the sheets were very dark and not worth showing.

Next, I got out the watercolors and made 4 pages rather quickly. What I did was layer my sheets; bottom later was cardstock, then 2 layers of paper towels and then the top layer a baby wipe. ( I told you I'm not very patient, wanted to do them all at once - LOL)

What I liked most about this technique is that I didn't have to worry about too much water. If I didn't like the depth/amount of color I had...I just added some water and the color went on through to the next layer under it. When I was pleased with the top baby wipe layer, I used a brayer to "push" the paint through to the layer underneath. I removed the baby wipe layer and did the same thing to the paper towels. A really cool thing happened on the bottom layer...the paper towel left the color on the card stock in a waffle-weave type pattern like the pattern in the paper towel. Very cool side effect!

Thanks, Bernie, I love this technique and will use it again & again. Here is a photo of the final results and the beginnings of an ATC using the paper towels & wipes as a background (they are torn up and stamped). One of my new favorite things to do.

The layers in the photo are from top to bottom: an ATC made with torn up pieces from all the others with a paisley pattern stamped on it, cardstock showing the waffle-weave design, a dried-out kitchen wipe, 3 sheets of paper towels & a baby wipe (with teddy bear!). You can click on the photos to see more detail in the background if you want. Enjoy!